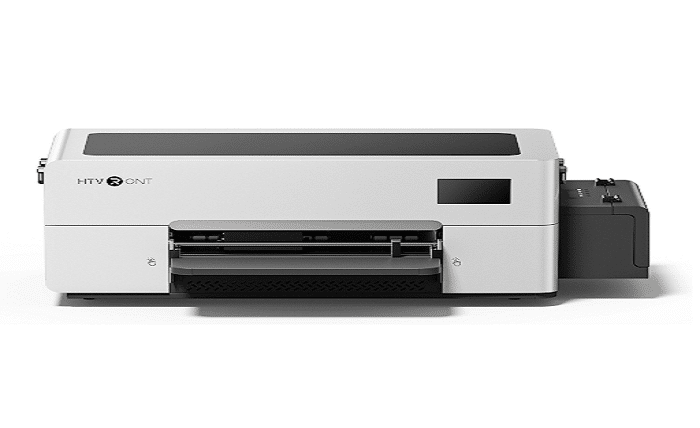
Direct to film printing has become a practical method for creating custom apparel because it allows detailed designs to be transferred onto garments without requiring traditional screen printing setups. For beginners, the process may seem complicated at first because several pieces of equipment and materials work together. Once each stage is understood, however, the workflow becomes much easier to manage.
A typical DTF setup includes a printer, special transfer film, textile pigment inks, adhesive powder, a curing method, and a heat press. Each part has a specific purpose. A beginner-friendly printer creates the printed design, the adhesive powder helps the design bond to fabric, a curing system prepares the transfer, and a heat press applies the finished transfer to the garment.
For someone starting from scratch, choosing a suitable dtf printer for beginners is an important first step. It is equally important to understand how the rest of the workflow operates rather than treating the printer as a standalone machine. This guide explains the complete DTF process, from artwork preparation to garment pressing, while covering practical considerations that can help new users work more consistently.
Understanding the DTF Printing Process
DTF stands for Direct to Film. Instead of printing a design directly onto a shirt, the artwork is first printed onto a specially coated transfer film. The printed surface then receives a layer of hot melt adhesive powder. After the powder is properly applied and cured, the transfer can be placed onto a garment and bonded using a heat press.
The first stage is preparing digital artwork. Designs should be created at an appropriate resolution and checked carefully before printing. Transparent backgrounds are commonly useful when the design does not require a large rectangular background. It is also important to consider the final size of the design, because artwork that looks good on a computer screen may need adjustments before being placed on a shirt.
After the artwork is ready, the DTF printer transfers the design onto film using textile-compatible inks. The printed film must be handled carefully because the ink is not yet ready to be pressed onto a garment. Adhesive powder is then applied to the printed area. This powder is responsible for creating the bond between the printed transfer and the fabric during the heat pressing stage.
The process therefore has several connected steps rather than one single printing action. Understanding this sequence helps beginners identify problems more easily. If a transfer does not adhere properly, for example, the cause may involve powder coverage, curing, pressing conditions, fabric selection, or another stage rather than the printer itself.
Choosing Beginner-Friendly DTF Equipment
Selecting equipment should start with the user’s actual production needs. A person making occasional shirts for personal projects may have different requirements from someone producing custom apparel regularly. Beginners should consider the types of garments they want to decorate, the expected workload, available workspace, and how much time they can dedicate to learning and maintaining the equipment.
A dtf printer for beginners should be considered as part of the complete workflow. New users often focus heavily on printer specifications while overlooking the importance of the curing and pressing stages. A balanced setup makes it easier to move from printing to transfer preparation and finally to garment application without unnecessary interruptions.
The DTF Oven is another important part of the process when using an oven-based curing method. After adhesive powder is applied to the printed film, the transfer needs to be cured so that the powder melts and forms a suitable adhesive layer. A dedicated DTF Oven can be incorporated into the workflow for this stage. Beginners should always follow the operating instructions provided for their specific equipment and materials rather than assuming that one setting works for every combination.
The heat press is also essential because the finished transfer needs controlled heat and pressure to bond with the garment. A heat press machine for clothes provides the pressing stage required for applying transfers to apparel. When selecting equipment, beginners should think about the entire production chain and make sure each component fits their intended workflow.
Preparing Artwork and Printing DTF Transfers
Good DTF results begin with properly prepared artwork. Before sending a design to the printer, check its dimensions, resolution, colors, and background. Designs should be sized according to the area of the garment where they will be placed. A chest design, sleeve design, and large front graphic may each require different dimensions.
It is also useful to create a simple system for organizing artwork files. Keep original editable designs separate from print-ready versions, and use clear file names that indicate the design, size, and intended garment. This can reduce mistakes when multiple orders or designs are being prepared at the same time.
Once the artwork is ready, the print settings should be selected according to the printer, ink, film, and software being used. Beginners should avoid changing multiple settings at once without understanding their purpose. If something goes wrong, making one controlled adjustment at a time makes it easier to determine what improved or caused the problem.
Before printing a large batch, producing a small test can save materials. Check whether the colors, fine details, and overall dimensions look suitable. It is better to identify an artwork or setup problem on a single transfer than after printing a large quantity. Keeping notes about successful settings can also make future jobs more consistent.
Applying Powder and Curing the Transfer
After printing, adhesive powder is applied to the inked side of the film. The powder needs to cover the appropriate printed areas so that the transfer can bond to the garment. Excess powder should be handled carefully and according to the material and equipment instructions. A clean, organized workspace makes this stage easier because loose powder can quickly become messy if it is not managed properly.
Curing is the stage where the adhesive powder is heated so that it melts and forms an adhesive layer. A DTF Oven can be used for this purpose when it is appropriate for the selected workflow. The correct curing procedure depends on the specific equipment and materials, so beginners should follow the manufacturer’s instructions rather than relying on generic temperatures or times found online.
Proper curing is important because the adhesive needs to be prepared for the later pressing stage. Under-curing and over-processing can both create problems, while inconsistent handling can make otherwise similar transfers behave differently. Beginners should focus on repeatable preparation and record the process that produces reliable results with their chosen materials.
Safety should always be part of the curing process. Heat-producing equipment should be placed in an appropriate workspace with sufficient ventilation and clearance. Users should avoid touching heated surfaces directly and should follow all safety instructions supplied with the equipment. Keeping the work area clean also helps prevent powder and other materials from interfering with the equipment.
Applying DTF Transfers With a Heat Press
Once a transfer has been printed and properly cured, the next stage is applying it to the garment. Start by preparing a clean, suitable surface and position the garment so that the print area is flat. Wrinkles, seams, pockets, and uneven surfaces can affect how a transfer sits on the fabric.
A heat press machine for clothes uses controlled heat and pressure to bond the transfer to the garment. The correct temperature, pressure, and pressing time depend on the transfer materials, garment fabric, and instructions provided by the relevant manufacturers. Beginners should therefore use recommended settings as a starting point rather than assuming every transfer requires the same conditions.
Fabric selection also matters. DTF transfers are commonly used for different apparel materials, but compatibility should always be checked before production. Cotton, polyester, blends, and other fabrics can respond differently to heat and pressure. A small test garment or sample area can help reduce the risk of wasting expensive garments when trying a new combination.
After pressing, follow the appropriate peeling and finishing instructions for the transfer being used. Some materials require a particular peel method or additional pressing step. The goal is to develop a repeatable process where garment preparation, transfer placement, pressing, and finishing are performed consistently for each order.
Maintenance, Consistency, and Common Beginner Mistakes
Regular maintenance is one of the most important habits for anyone using DTF equipment. Printers can require careful attention because ink systems need to remain in suitable working condition. Following the manufacturer’s maintenance schedule and using the recommended cleaning procedures can help prevent avoidable interruptions.
Beginners should also keep track of materials. Store films, inks, powders, and garments appropriately and keep the workspace organized. Mixing different materials without understanding their compatibility can make troubleshooting difficult. Keeping a record of the printer settings, artwork size, powder process, curing procedure, and pressing conditions can gradually create a reliable production routine.
One common mistake is trying to produce too many transfers before confirming that the workflow works correctly. Another is changing several variables at the same time when troubleshooting. If the print looks different, the adhesive behaves unexpectedly, or the transfer does not apply as expected, check each stage systematically. Review the artwork, printing process, powder application, curing, fabric, and pressing procedure.
Material waste can also be reduced through careful planning. Group similar jobs together when practical, prepare artwork before starting the printer, and check garment sizes and placement before pressing. Beginners can improve consistency by treating every order as a repeatable process rather than improvising every step.
As experience grows, small improvements can make a significant difference to workflow organization. Keep frequently used supplies within easy reach, label materials clearly, maintain a clean workspace, and document successful settings. These simple habits make it easier to repeat good results and identify the source of problems when something changes.
Conclusion
DTF printing can be a useful approach for beginners who want to learn custom apparel production because the process combines digital artwork with a practical garment transfer method. The key is to understand how each stage connects to the next rather than focusing only on the printer.
A suitable dtf printer for beginners provides the starting point for creating printed transfers, while adhesive powder and a DTF Oven prepare those transfers for garment application. The final stage uses a heat press machine for clothes to bond the design to the selected fabric. When these stages are handled carefully and consistently, beginners can build a more organized workflow and improve their results through practice.
The best way to learn is to start with manageable projects, test materials before large production runs, follow equipment instructions, and keep notes about successful processes. With careful artwork preparation, proper material handling, regular maintenance, and consistent pressing practices, new DTF users can develop the skills needed to produce custom apparel with greater confidence and less unnecessary waste.